


Chicken curry recipe doesn’t have to be complicated — and you definitely don’t need a long list of fancy spices to make it taste amazing. What truly matters is using the right technique, cooking at the right time, and knowing a few simple tricks that most restaurants never share.
This recipe skips the usual storytelling and gets straight to what you actually need — clear steps, real flavors, and practical tips that work every single time.
Whether you’re cooking for your family, treating friends, or just want a cozy bowl of curry on a rainy evening, this guide will help you nail it with ease.
Let’s dive in and cook up a rich, flavorful chicken curry recipe you’ll want to make again and again.
What Makes This Chicken Curry Recipe Different?
Before we start, let me tell you what sets this recipe apart from the dozens you’ve probably already tried.
The Secret? Layering Flavors
Most recipes dump everything in at once. That’s why the curry tastes flat.
Great chicken curry recipe builds flavor in layers—whole spices first, onions cooked properly, tomatoes reduced correctly, chicken added at the right time. Each step adds depth.
Restaurant Tricks at Home
Restaurants use techniques home cooks skip:
- Browning onions properly (not just sautéing)
- Adding spices at the right temperature
- Using the correct chicken-to-gravy ratio
- Finishing with fresh cream or butter
You’re getting all of that here.
Flexible for Your Taste
Some like it spicy. Others prefer mild. This recipe gives you the base, then shows you how to adjust heat, richness, and consistency to your preference.
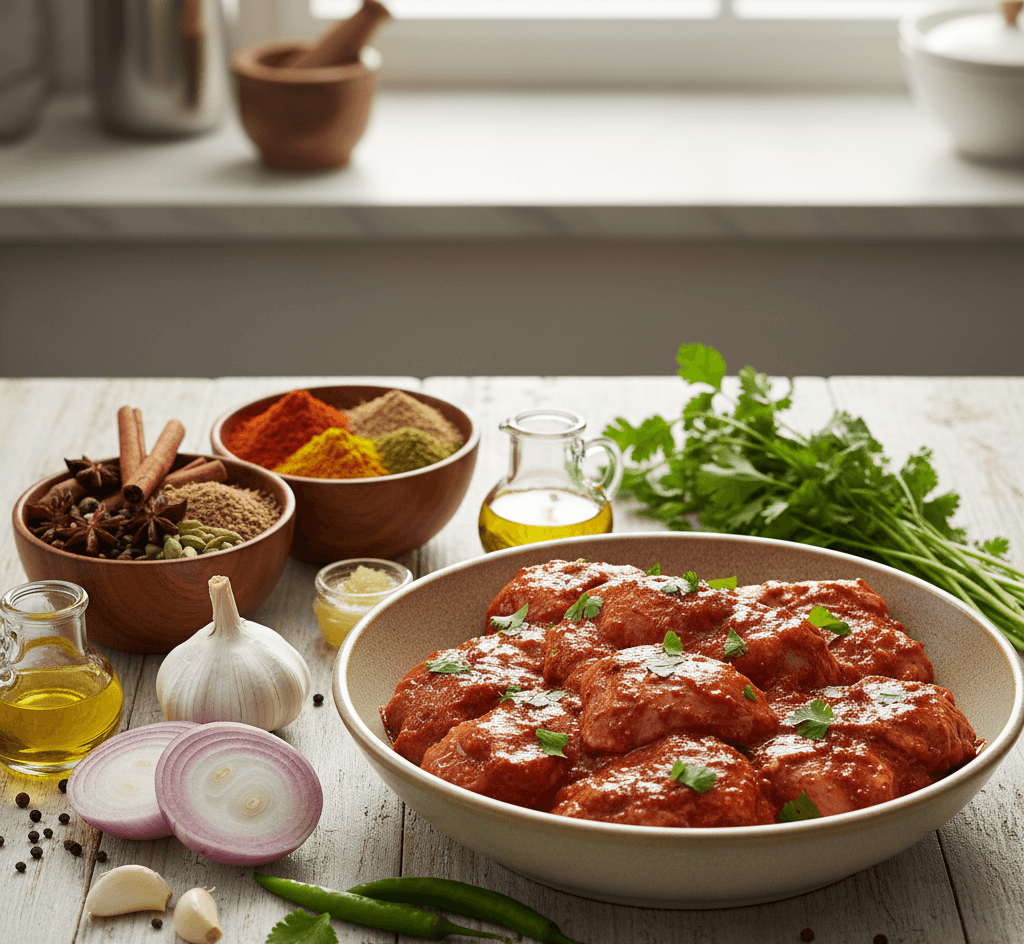
Ingredients: What You Actually Need
For the Chicken (Serves 4)
Main Ingredients:
- 750g chicken (bone-in pieces work best, or boneless if you prefer)
- 3 large onions, finely chopped
- 3 medium tomatoes, pureed or finely chopped
- 2 tablespoons ginger-garlic paste
- 1/2 cup yogurt (curd), whisked
- 4 tablespoons cooking oil or ghee
- 1/2 cup water (adjust for gravy consistency)
- Salt to taste
- Fresh coriander leaves for garnish
Whole Spices:
- 2-3 green cardamom pods
- 1 black cardamom (optional, but adds depth)
- 1 inch cinnamon stick
- 4-5 whole cloves
- 1 bay leaf
- 1 teaspoon cumin seeds
Ground Spices:
- 1 teaspoon turmeric powder
- 2 teaspoons red chili powder (adjust to taste)
- 1 tablespoon coriander powder
- 1 teaspoon cumin powder
- 1 teaspoon garam masala
For Richness (Optional but Recommended):
- 2 tablespoons fresh cream
- 1 tablespoon butter
- 1 teaspoon kasuri methi (dried fenugreek leaves)
Ingredient Notes That Matter
Chicken Choice: Bone-in pieces (thighs, drumsticks) give more flavor. Boneless cooks faster and is easier to eat. Your call.
Onions: Don’t skip proper browning. This is where half your curry flavor comes from.
Yogurt: Whisking prevents curdling. Room temperature yogurt works better than fridge-cold.
Tomatoes: Fresh tomatoes taste better but take longer to cook down. Pureed tomatoes save time and give smoother gravy.
READ MORE:- Chocolate Cake Recipe
Step-by-Step Chicken Curry Recipe
Step 1: Marinate the Chicken (15 Minutes)
What to Do: Mix chicken pieces with:
- 1/4 cup yogurt
- 1/2 teaspoon turmeric
- 1/2 teaspoon red chili powder
- Salt to taste
Why It Matters: Marination tenderizes chicken and adds base flavor. Even 15 minutes makes a difference.
Pro Tip: If you have time, marinate for 30 minutes to 2 hours in the fridge. Longer is better, but not mandatory.
Step 2: Temper the Whole Spices (2 Minutes)
What to Do:
- Heat 4 tablespoons oil/ghee in a heavy-bottomed pan or kadhai
- When oil is hot (but not smoking), add all whole spices
- Let them sizzle for 30-45 seconds until fragrant
Why It Matters: Whole spices release essential oils when heated in fat. This creates the aromatic base of your curry.
Watch Out: Don’t burn the spices. If they turn black, start over. Burnt spices = bitter curry.
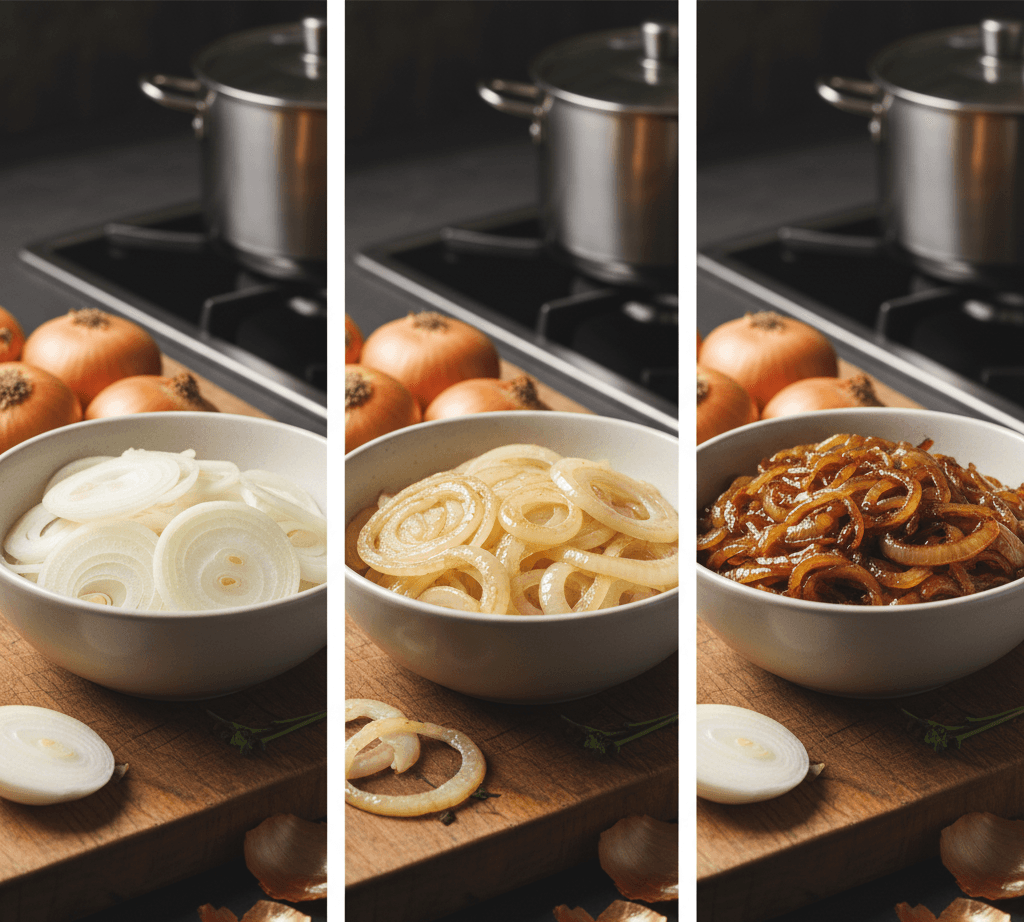
Step 3: Brown the Onions (10-12 Minutes)
What to Do:
- Add chopped onions to the tempered spices
- Cook on medium-high heat, stirring frequently
- Cook until onions turn golden brown (not just translucent—actually brown)
Why It Matters: This is the most important step. Properly browned onions give curry its deep, rich flavor. Undercooked onions = watery, bland curry.
How to Know They’re Done: Onions should be golden-brown and smell sweet, not raw. They’ll reduce in volume by half.
Pro Tip: Add a pinch of salt while cooking onions. It draws out moisture and speeds up browning.
Step 4: Add Ginger-Garlic Paste (2 Minutes)
What to Do:
- Add 2 tablespoons ginger-garlic paste to browned onions
- Sauté for 1-2 minutes until raw smell disappears
Why It Matters: Cooking ginger-garlic removes the raw, sharp taste. Undercooked ginger-garlic ruins the curry.
Watch Out: Stir constantly. Ginger-garlic paste sticks to the pan and burns quickly.
Step 5: Add Ground Spices (1 Minute)
What to Do:
- Lower heat to medium
- Add turmeric, coriander powder, cumin powder, and red chili powder
- Stir continuously for 30-60 seconds
Why It Matters: Cooking spices in oil releases their flavors and removes the raw taste.
Critical Point: Keep heat medium-low. High heat burns spices instantly, making curry bitter.
Pro Tip: If spices start sticking, add 1-2 tablespoons water and stir.
Step 6: Cook the Tomatoes (8-10 Minutes)
What to Do:
- Add pureed or chopped tomatoes
- Cook on medium heat, stirring occasionally
- Cook until tomatoes break down completely and oil separates (you’ll see oil pooling at the edges)
Why It Matters: Tomatoes need to cook down completely. Raw tomatoes make curry tangy and watery instead of rich and thick.
How to Know It’s Ready: The masala (spice mixture) will darken, thicken, and oil will visibly separate from the sides.
Pro Tip: If tomatoes aren’t breaking down, mash them against the pan with your spoon.
Step 7: Add Yogurt (3-4 Minutes)
What to Do:
- Lower heat to medium-low
- Add whisked yogurt, 1 tablespoon at a time
- Stir continuously after each addition
- Cook until yogurt is fully incorporated and oil separates again
Why It Matters: Yogurt adds tanginess and richness. Adding slowly prevents curdling.
Watch Out: High heat or adding yogurt all at once causes curdling (lumpy, separated curry). Nobody wants that.
Step 8: Add the Chicken (2 Minutes)
What to Do:
- Add marinated chicken pieces to the masala
- Stir to coat chicken completely with masala
- Cook for 2-3 minutes, stirring frequently
Why It Matters: Coating chicken with masala before adding water ensures every piece is flavorful.
Step 9: Add Water and Simmer (20-25 Minutes)
What to Do:
- Add 1/2 to 3/4 cup water (depending on how thick you want the gravy)
- Add salt to taste
- Bring to a boil, then lower heat
- Cover and simmer for 20-25 minutes until chicken is cooked through
For Bone-In Chicken: 25-30 minutes For Boneless: 15-20 minutes
Why It Matters: Slow simmering makes chicken tender and allows flavors to develop.
Pro Tip: Check halfway through. If gravy is too thick, add water. If too thin, simmer uncovered to reduce.
How to Check Chicken is Done: Insert a knife into the thickest piece. Juices should run clear, not pink.
Step 10: Finish with Richness (2 Minutes)
What to Do:
- Add 1 teaspoon garam masala
- Add 2 tablespoons fresh cream (optional)
- Add 1 tablespoon butter (optional)
- Crush kasuri methi between your palms and add (optional)
- Stir gently and cook for 1-2 minutes
Why It Matters: These finishing touches add restaurant-quality richness and aroma.
Garam Masala: Add at the end, not during cooking. Heat destroys its delicate aroma.
Kasuri Methi: Adds that distinctive restaurant curry smell.
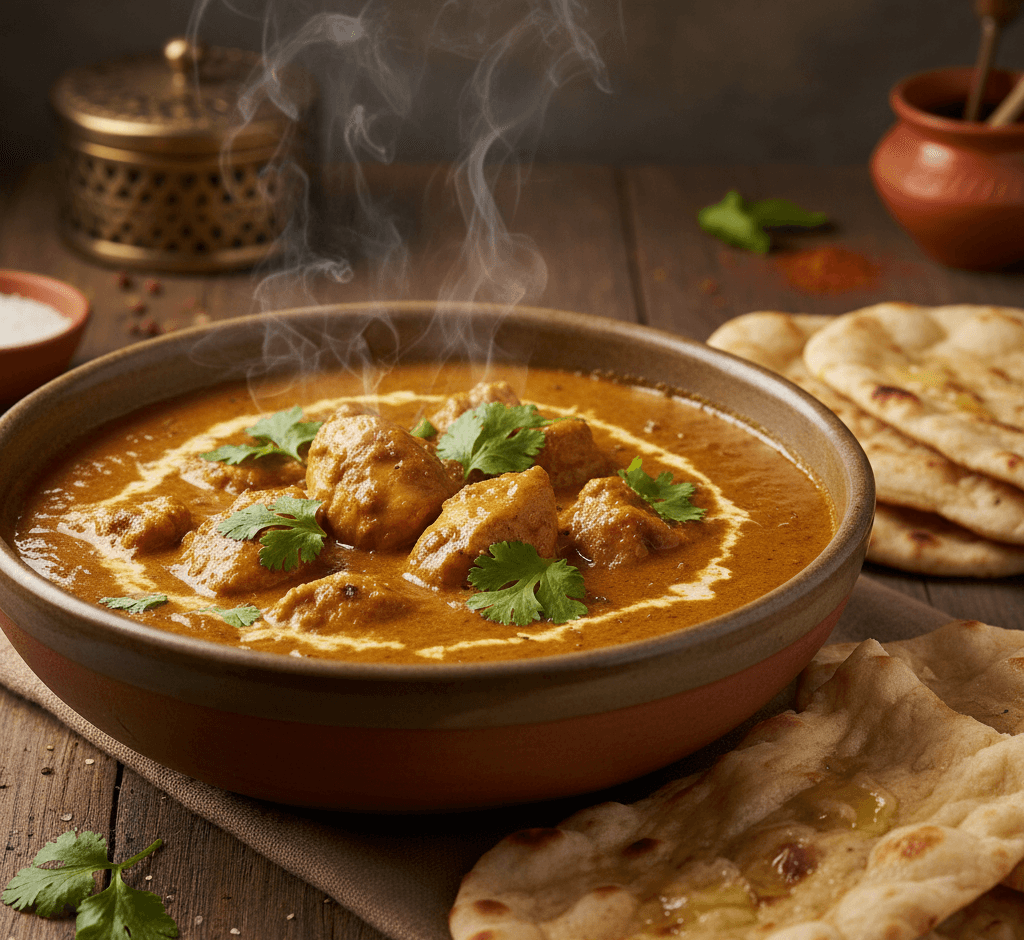
Step 11: Garnish and Serve
What to Do:
- Turn off heat
- Garnish with fresh coriander leaves
- Serve hot with rice, naan, or roti
Pro Tip: Let curry rest for 5 minutes after cooking. Flavors develop further.
Variations: Make It Your Own
Spice Level Adjustments
Mild Curry:
- Reduce red chili powder to 1/2 teaspoon
- Skip green chilies
- Add extra cream or yogurt
Medium Spicy:
- Use 1.5 teaspoons red chili powder
- Add 1-2 slit green chilies
Extra Spicy:
- Use 2-3 teaspoons red chili powder
- Add 3-4 slit green chilies
- Include 1/2 teaspoon black pepper powder
Regional Variations
North Indian Style (Butter Chicken-ish):
- Add extra butter and cream
- Use less red chili, more kasuri methi
- Finish with honey (1 teaspoon) for slight sweetness
South Indian Style:
- Add 1 teaspoon mustard seeds with whole spices
- Include curry leaves
- Add coconut milk instead of cream
- Finish with tamarind paste for tanginess
Punjabi Dhaba Style:
- Use more oil/ghee
- Add thick yogurt
- Include chopped green chilies
- Finish with extra butter on top
Restaurant Style:
- Add cashew paste (10-12 cashews blended) with yogurt
- Use extra cream
- Finish with butter on top
- Garnish with dried fenugreek
Common Mistakes and How to Fix Them
Problem: Curry Tastes Bland
Causes:
- Onions not browned enough
- Spices not cooked properly
- Not enough salt
- No finishing spices (garam masala)
Fix:
- Always brown onions properly (golden-brown, not translucent)
- Cook spices in oil until aromatic
- Add salt in layers—while cooking chicken, then adjust at end
- Never skip garam masala at the end
Problem: Curry is Too Watery
Causes:
- Too much water added
- Tomatoes not cooked down
- Not simmered long enough
Fix:
- Simmer uncovered on medium heat to reduce excess liquid
- Next time, add water gradually—you can always add more
- Cook masala base until oil separates before adding water
Problem: Curry is Too Oily
Causes:
- Using too much oil/ghee
- Not removing excess oil after browning
Fix:
- Use less oil next time (2-3 tablespoons is enough)
- Skim excess oil from surface before serving
- Balance with extra tomatoes or yogurt
Problem: Chicken is Dry and Tough
Causes:
- Overcooked
- High heat cooking
- No marination
Fix:
- Simmer on low heat, don’t boil aggressively
- Always marinate chicken (even 15 minutes helps)
- Use bone-in chicken for juicier results
- Don’t overcook—20-25 minutes is enough
Problem: Yogurt Curdled
Causes:
- Added yogurt to hot masala all at once
- Used fridge-cold yogurt
- Heat too high
Fix:
- Always whisk yogurt before adding
- Add gradually, 1 tablespoon at a time
- Keep heat medium-low when adding yogurt
- Use room temperature yogurt
Pro Tips from Restaurant Kitchens
Tip 1: The Oil Separation Test
Always cook each step until you see oil separating. This indicates that stage is properly cooked.
After onions—oil separates.
This is your visual cue that you’re on track.
Tip 2: The Bone-In Advantage
Restaurants prefer bone-in chicken. Bones release collagen and marrow during cooking, making gravy richer and more flavorful.
If you must use boneless, add 1/2 teaspoon of chicken bouillon or stock for depth.
Tip 3: The Cream Trick
Add cream at the end, not during cooking. Cooking cream for too long makes it split and lose richness.
2 tablespoons is enough for restaurant-style richness without making it too heavy.
Tip 4: Kasuri Methi Magic
Crush dried fenugreek leaves between your palms before adding. This releases the aroma.
This single ingredient makes people say “this tastes exactly like restaurant curry.”
Tip 5: Rest Before Serving
Let curry sit for 5-10 minutes after cooking. Flavors meld together and chicken absorbs more masala.
Reheated next day tastes even better.
Serving Suggestions
Best Accompaniments
Breads:
- Butter naan (classic choice)
- Garlic naan (adds extra flavor)
- Tandoori roti (healthier option)
- Plain paratha
- Jeera rice pairing
Rice:
- Steamed basmati rice
- Jeera rice (cumin rice)
- Pulao
- Plain rice
Sides:
- Raita (yogurt with cucumber)
- Sliced onions with lemon
- Green chutney
- Pickle (achaar)
- Papad
Salad:
- Sliced onions, cucumber, tomatoes
- Lemon wedges
- Fresh coriander
Storage and Reheating
Storing Leftover Chicken Curry Recipe
Refrigerator:
- Store in airtight container
- Keeps well for 3-4 days
- Flavors develop and taste better next day
Freezer:
- Can freeze for up to 2 months
- Thaw in refrigerator overnight before reheating
- Gravy consistency might change slightly—add water while reheating
Reheating Tips
Stovetop (Best Method):
- Heat on low-medium flame
- Add 2-3 tablespoons water if too thick
- Stir occasionally
- Heat until bubbling
Microwave:
- Transfer to microwave-safe bowl
- Cover loosely
- Heat in 2-minute intervals, stirring between
- Add water if needed
Pro Tip: Reheated curry often tastes better because chicken absorbs more masala overnight.
Nutritional Information (Per Serving)
Approximate values for 1 serving (out of 4):
- Calories: 380-420 kcal
- Protein: 32-35g
- Fat: 22-26g
- Carbohydrates: 12-15g
- Fiber: 3-4g
Notes:
- Values vary based on chicken cut (bone-in vs boneless)
- Using cream and butter increases calories
- Boneless chicken breast is lowest in fat
- Yogurt adds protein and probiotics
Frequently Asked Questions
Can I Make This Without Yogurt?
Yes. Replace yogurt with:
- Fresh cream (2-3 tablespoons)
- Coconut milk (1/4 cup)
- Tomato puree (extra 1/2 cup)
Curry will taste slightly different but still good.
Can I Use Chicken Breast?
Yes, but:
- Boneless breast cooks faster (15 minutes)
- Tends to dry out more easily
- Has less flavor than thighs
- Cut into slightly larger pieces to prevent overcooking
How Do I Make It Healthier?
Healthier modifications:
- Use less oil (2 tablespoons instead of 4)
- Skip cream and butter
- Use Greek yogurt instead of regular
- Add vegetables (bell peppers, peas, carrots)
- Use skinless chicken
- Serve with brown rice or whole wheat roti
Can I Add Vegetables?
Absolutely! Add:
- Bell peppers (add with chicken)
- Potatoes (add with chicken, they take time)
- Green peas (add 5 minutes before finishing)
- Carrots (add with chicken)
- Spinach (add at the end)
Why Doesn’t My Curry Taste Like Restaurant Curry?
Common reasons:
- Onions not browned enough (most common)
- Skipping whole spices
- Not cooking tomatoes completely
- Missing finishing touches (garam masala, cream, kasuri methi)
- Not enough salt
- Using old spices (check expiry dates)
Can I Make This in Pressure Cooker?
Yes:
- Follow steps 1-8 as written
- After adding water, pressure cook for 2-3 whistles
- Release pressure naturally
- Open and adjust consistency
- Add finishing touches
Faster but slightly less flavor development.
Is This Gluten-Free?
Yes, this chicken curry recipe is naturally gluten-free. Just ensure:
- Spice powders don’t have added fillers
- Serve with rice instead of naan/roti for completely gluten-free meal
Conclusion: You’ve Got This
There it is—everything you need to make restaurant-quality chicken curry recipe at home.
Is it the exact recipe from your favorite restaurant? Probably not. Every kitchen has its secrets.
But this chicken curry recipe gives you the foundation. Master this, and you can experiment with your own variations.
Remember the key principles:
- Brown onions properly (don’t rush this)
- Cook each stage until oil separates
- Add yogurt gradually
- Simmer patiently
- Finish with garam masala and richness


One thought on “Chicken Curry Recipe”